Enabling Authentication
Contents
Enabling Authentication#
Enabling Authentication using JupyterHub as an OAuth provider#
Update deploy/config.yaml or deploy/prod.yaml with the following configuration#
config:
  BinderHub:
    auth_enabled: true

jupyterhub:
  cull:
    # don't cull authenticated users
    users: False

  custom:
    binderauth_enabled: true

  hub:
    redirectToServer: false
    services:
      binder:
        oauth_redirect_uri: "http://<binder-ip>/oauth_callback"
        oauth_client_id: "binder-oauth-client-test"

  singleuser:
    # to make notebook servers aware of hub
    cmd: jupyterhub-singleuser
This will set up the redirection to the JupyterHub for login and spin-up user servers.
OAuth with GitHub#
Modify the hub section of deploy/config.yaml or deploy/prod.yaml to include the following#
hub:
  config:
    GitHubOAuthenticator:
      oauth_callback_url: "https://<hub-ip>/hub/oauth_callback"
    JupyterHub:
      authenticator_class: github
Modify the jupyterhub.hub section of deploy/secret-template.yaml or deploy/prod-template.yaml with the following#
hub:
  config:
    GitHubOAuthenticator:
      client_id: "clientId"
      client_secret: "clientSecret"
Note
Don’t worry about clientId and clientSecret yet as we will generate these on GitHub.
Create an OAuth app on GitHub#
Go to the binderhub-test-org organisation on github.com.
Under Settings -> Developer Settings -> OAuth Apps, click New OAuth App.
Fill in the form as per the image below and click Register Application:
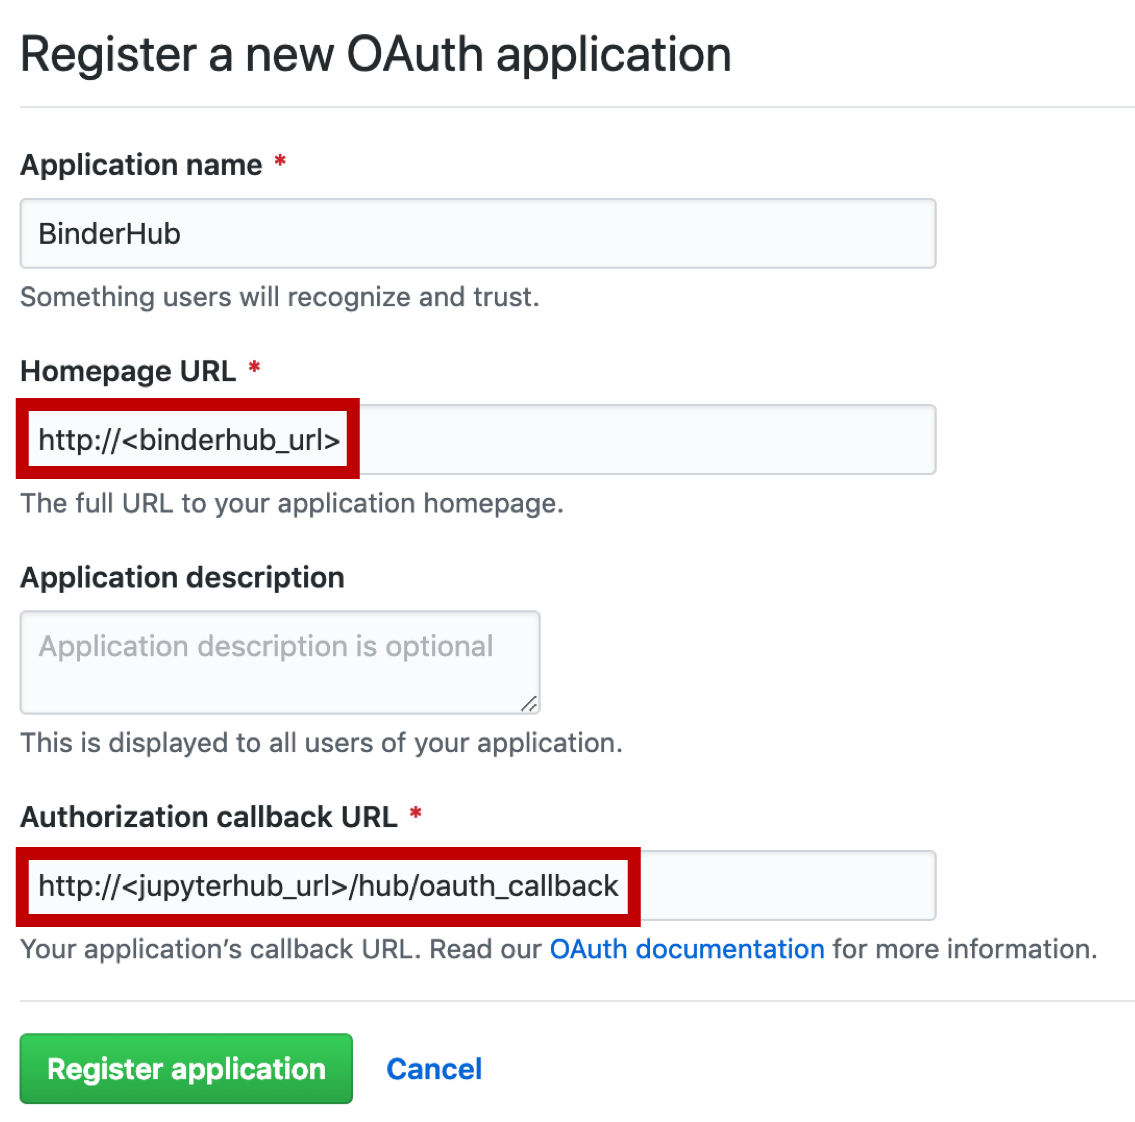
This will create an OAuth app owned by binderhub-test-org that will allow anyone with a valid GitHub account to login to Hub23.
The clientId and clientSecret values will be generated.
Add these values to the key vault (see Adding secrets to the Key Vault) and create a sed command to populate deploy/secret-template.yaml.
Giving access to GitHub organisations#
Warning
This section of the docs is a work in progress and needs improvement.
Update deploy/config.yaml or deploy/prod.yaml to include the following under hub.config:
hub:
  config:
    GitHubOAuthenticator:
      allowed_organizations:
        - "binderhub-test-org"
    ...
    OAuthenticator:
      scope:
        - "read:user"
The read:user scope will read a user’s organisation/team memberships and look for binderhub-test-org.
If the membership is not found, they will be forbidden from accessing Hub23.
This scope requires a user’s membership of binderhub-test-org to be public.
Enabling Named Servers#
With authentication enabled, BinderHub automatically launches new pods with the username of the authenticated person in the pod name.
This can cause errors such as Launch failed. User already has a running server.
To avoid this, we can used named servers.
To enable this feature, add the following to deploy/config.yaml or deploy/prod.yaml.
config:
  BinderHub:
    use_named_servers: true
  jupyterhub:
    hub:
      allowNamedServers: true
The number of named servers a user is allowed can be controlled as in the following example.
jupyterhub:
  hub:
    namedServerLimitPerUser: 5